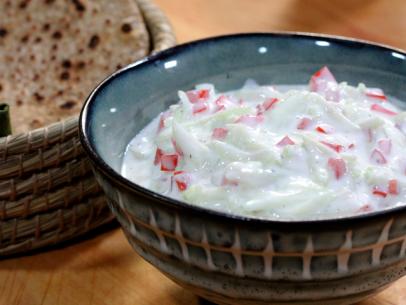
Yogurt Yogurt
Ingredients
Directions
Special equipment:
Four 1-quart mason jars, 1 for the yogurt, 3 for the cooler (see note) Medium bowl Meat thermometer Funnel (optional) Small cooler- Cleaning and Preheating: Before you get started, bring a large pot of water to a boil over high heat. Once boiling, shut off the heat. Rinse out the mason jar you'll be using for yogurt with some of the hot water. Fill the jar with more hot water and set it aside to preheat. All lids, bowls, spoons, forks or funnels should get a quick dunk in hot water too.
- Fill the cooler with hot water to about 2 inches. Fill the remaining 3 jars with hot water, seal tightly and set in the cooler. Shut the cooler lid to allow the whole thing to preheat. This is your incubation chamber, your fermentation vessel, your magic box.
- Place the yogurt (your starter) in a medium bowl and set it aside to allow it to warm to room temperature. (Resist the impulse to add more starter. Though it seems like a good idea, it actually produces a thinner, more fragile yogurt.)
- Milking: Run a little tap water in a small, heavy saucepan. Swirl it around to coat the interior, and discard (the water, not the saucepan). This small step reduces the adhesion of milk proteins to the metal, minimizing scorching.
- Add the milk and half-and-half to the saucepan and warm slowly over medium-low heat until the milk reaches 185 to 190 degrees F. Take it slow, 20 or more minutes is a-ok. The slower you warm the milk, the smoother the final result. Stir frequently with a rubber spatula, being sure to run the spatula over the bottom and sides of the saucepan. All this attention reduces the formation of milk "skin" (though don't stress any that does form) and limits the sticking and scorching of milk solids. You'll know the milk is at or near its target temperature when you see steam coming off the surface and small bubbles forming at the edges. Once the milk has hit its target temperature, remove it from the heat to cool while you finish preparing your incubation chamber.
- Fermenting: Check the temperature of the water in the cooler (probably still quite hot) and add enough water, warm or cool as needed, to get the whole thing to 115 degrees F (about the temperature of very warm tap water). No higher, please. Really, 115 and not any higher. It is not worth running the risk of killing off the lactic acid bacteria in your starter.
- When the temperature of the milk has dropped to 115 degrees, pour about half a cup (no need to be precise) into the bowl with your starter yogurt. (If the milk has dropped below 115, just gently heat it back to temperature before adding it to the starter.) Whisk with a fork to dissolve the yogurt, and then add the mixture back to the saucepan.
- Empty the preheated mason jar-the one you set aside for yogurt-of its hot water. Now, pour in contents and stir well. Seal the jar tightly and transfer it to the cooler. Adjust the water level in the cooler to reach just shy of the lids.
- Close the cooler and stow it someplace peaceful and warm, away from any potential jostling, meddling or peeking. Now comes the hard part: the waiting. Yogurt wants, needs, stillness for proper coagulation. You, on the other hand, will be overcome by the urge to check the set, take the temperature, offer words of encouragement. Stop! Give the milk its 'me' time. Let it meditate. It will reward you with yogurt.
- Six to eight hours later, go ahead and have a look. Take the jar out of the cooler, remove the lid, and peer into the mystery before you. What was liquid should now be semi-solid. Try a little. If it tastes like yogurt and you like what you taste, refrigerate it and call it a day.
- More likely, though, the yogurt will taste a little flat. The texture might be good, but the flavor will have little of the lactic tang that makes yogurt so distinctive. Instead, I encourage you to give long, slow fermentation a chance. Though it seems kind of scary-won't it spoil?-time allows for all sorts of wonderful flavors to develop, and for more lactose to be converted to lactic acid (which actually has a preservative effect). With slow fermentation you get fuller flavored, tangier yogurt.
- So, once you've tasted and tested, raise the water in the cooler back to 100 to 105 degrees F, and return the yogurt to the cooler. Ferment for another 12 to 15 hours. Taste again. I got my best results after 22 hours of total incubation-with most of the last 10 hours hovering between 85 and 95 degrees-but yogurt is highly variable, and you could take it even further if you think it would benefit from still more acidity. Let your palate guide you.
- When through fermenting, refrigerate your yogurt for 3 hours, to allow its structure to firm up. The end result should be almost pudding-like, closer to Greek yogurt than to conventional yogurt.
- And there you have it, in a few simple steps, you, you, have saved one of the most perishable foods in nature from the forces of rot, and converted it into something durable and delicious.
Cook’s Note
If your cooler is larger enough to fit more mason jars, go ahead and add more. Or, better yet, make more yogurt. If you don't have mason jars, feel free to use quart-size plastic containers, the kind you get from takeout restaurants. They may not win on aesthetics, but they retain heat well. If you do use takeout containers, here's a tip: Submerge them in water at an angle. Doing so prevents them from floating.
Looking for Something Else?


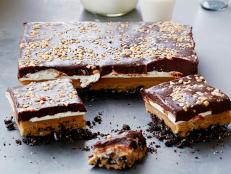
Fudge Factor


Over-the-Top-Delicious Treats to Satisfy Your Food Obsession
Are you infatuated with ice cream? Do you lust over lobster? Swoon at the sight of chocolate? Here's the best recipe for each food …

The Craziest Chocolate Creations for American Chocolate Week Mar 17, 2013
It’s officially American Chocolate Week. Check out photos of mind-blowing chocolate creations.

Sifted: Plan-Ahead Valentine's Day Desserts Feb 6, 2013
Get our take on the best in food news, recipes and more from around the web, including the best Valentine's Day recipes.

Train Frontman Pat Monahan's Dark Chocolate Obsession Feb 11, 2013
Train frontman Pat Monahan, an avid chocolate lover, shared with us his top five reasons for eating dark chocolate.
Hungry Girl's Chocolate 911 Feb 4, 2011


Review: Anthony Bourdain and Eric Ripert's Chocolate Bar Nov 16, 2012
Anthony Bourdain and Eric Ripert have teamed up with master chocolatier Christopher Curtin to create the "Good & Evil" chocolate b …

Craving: Chocolate Cake Jan 27, 2011

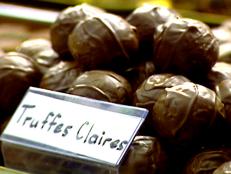
Chocolate Desserts
Indulge in our decadent chocolate desserts, from cookies and cakes to puddings, souffles and truffles.

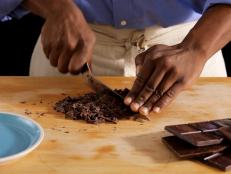
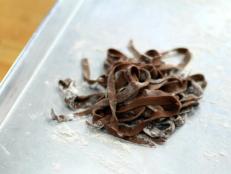
How to Chop and Melt Chocolate
Lots of recipes call for melted chocolate. Follow these step-by-step instructions to do it properly.

Chocolate Matzo Brittle Apr 13, 2011

Sifted: Birthday Doughnuts, Crepe Cupcakes and Carrot Cake Pancakes Mar 21, 2012

Matt Entertains: Chocolate Cherry Cookies Oct 22, 2010

Essentials: Chocolate Basics Sep 1, 2016
Satisfy that chocolate craving in your very own kitchen. All you need is baking chocolate and a little know-how. It also helps to …